Masks
A real-space mask is important to boost SNR by focusing the analysis on the region of interest.
Using the GUI: the Mask Wizard
To make a solvent or focus mask in the GUI, use the built-in Mask Wizard. Open any job's Volumes tab and click the green wand icon on a volume (usually the mean reconstruction) to launch it.
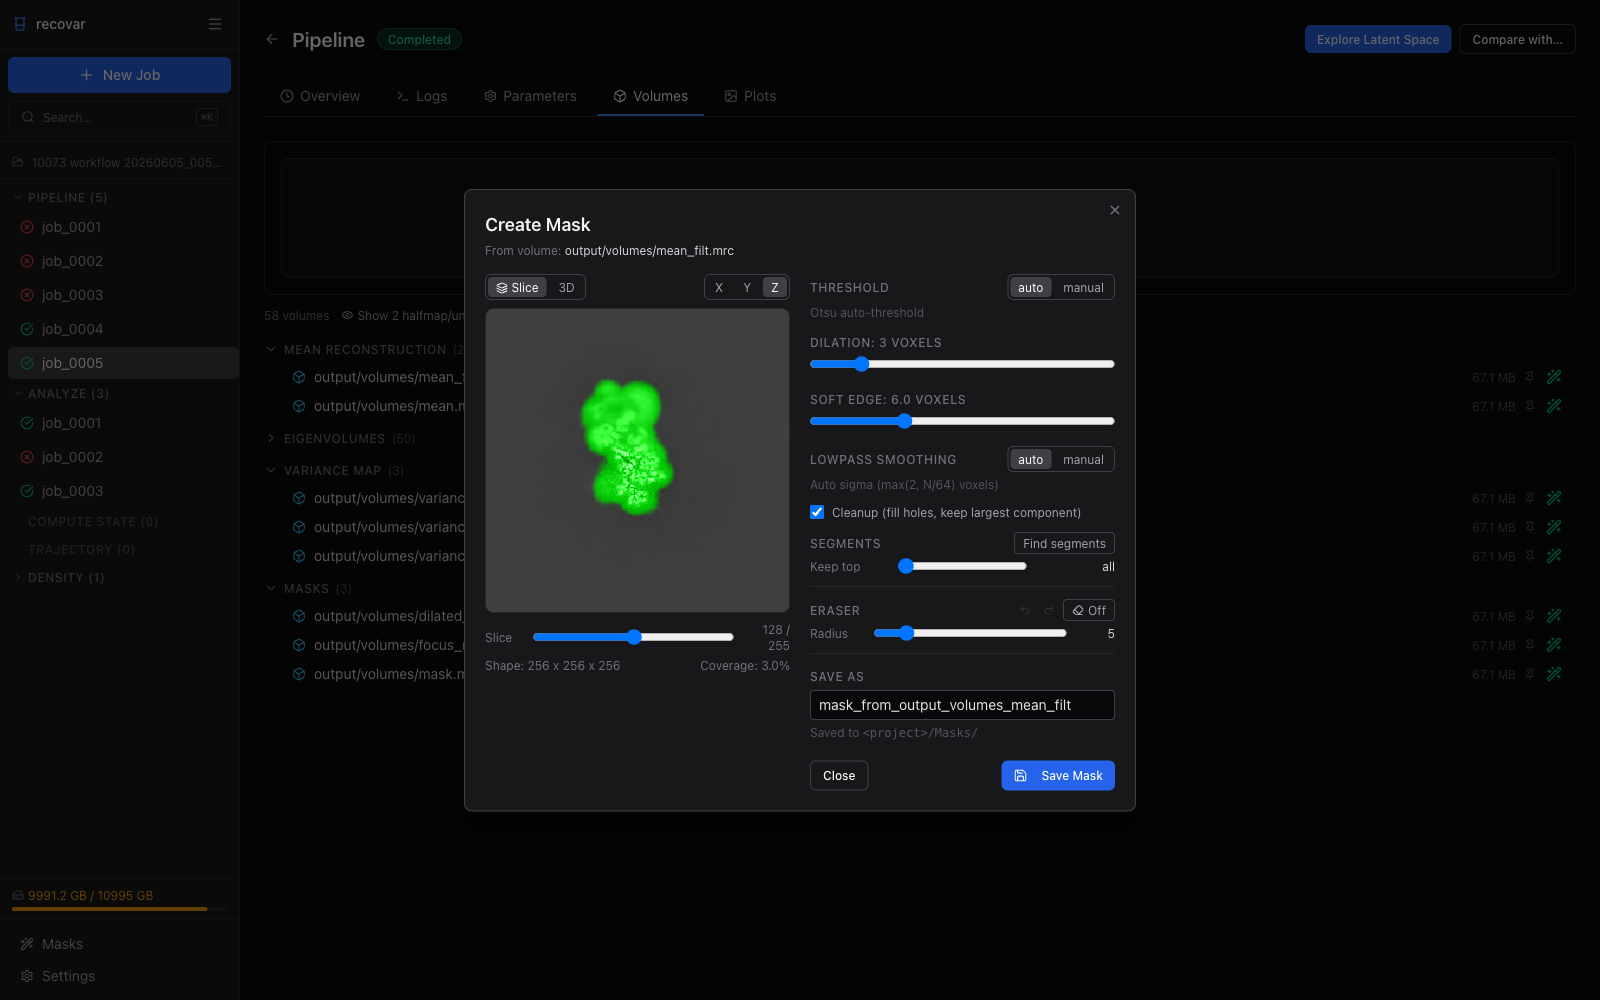
The wizard builds a mask from the volume and previews it live as you adjust:
- Threshold -- automatic (Otsu) or a manual density cutoff
- Dilation -- expand the mask outward by a number of voxels
- Soft edge -- width of the cosine falloff at the mask boundary
- Lowpass smoothing -- automatic or manual, to smooth the surface
- Cleanup -- fill interior holes and keep only the largest connected component
- Segments -- run connected-component analysis and keep the N largest blobs
Switch between the Slice view (scroll through X / Y / Z planes with the green mask overlaid) and the 3D isosurface view:
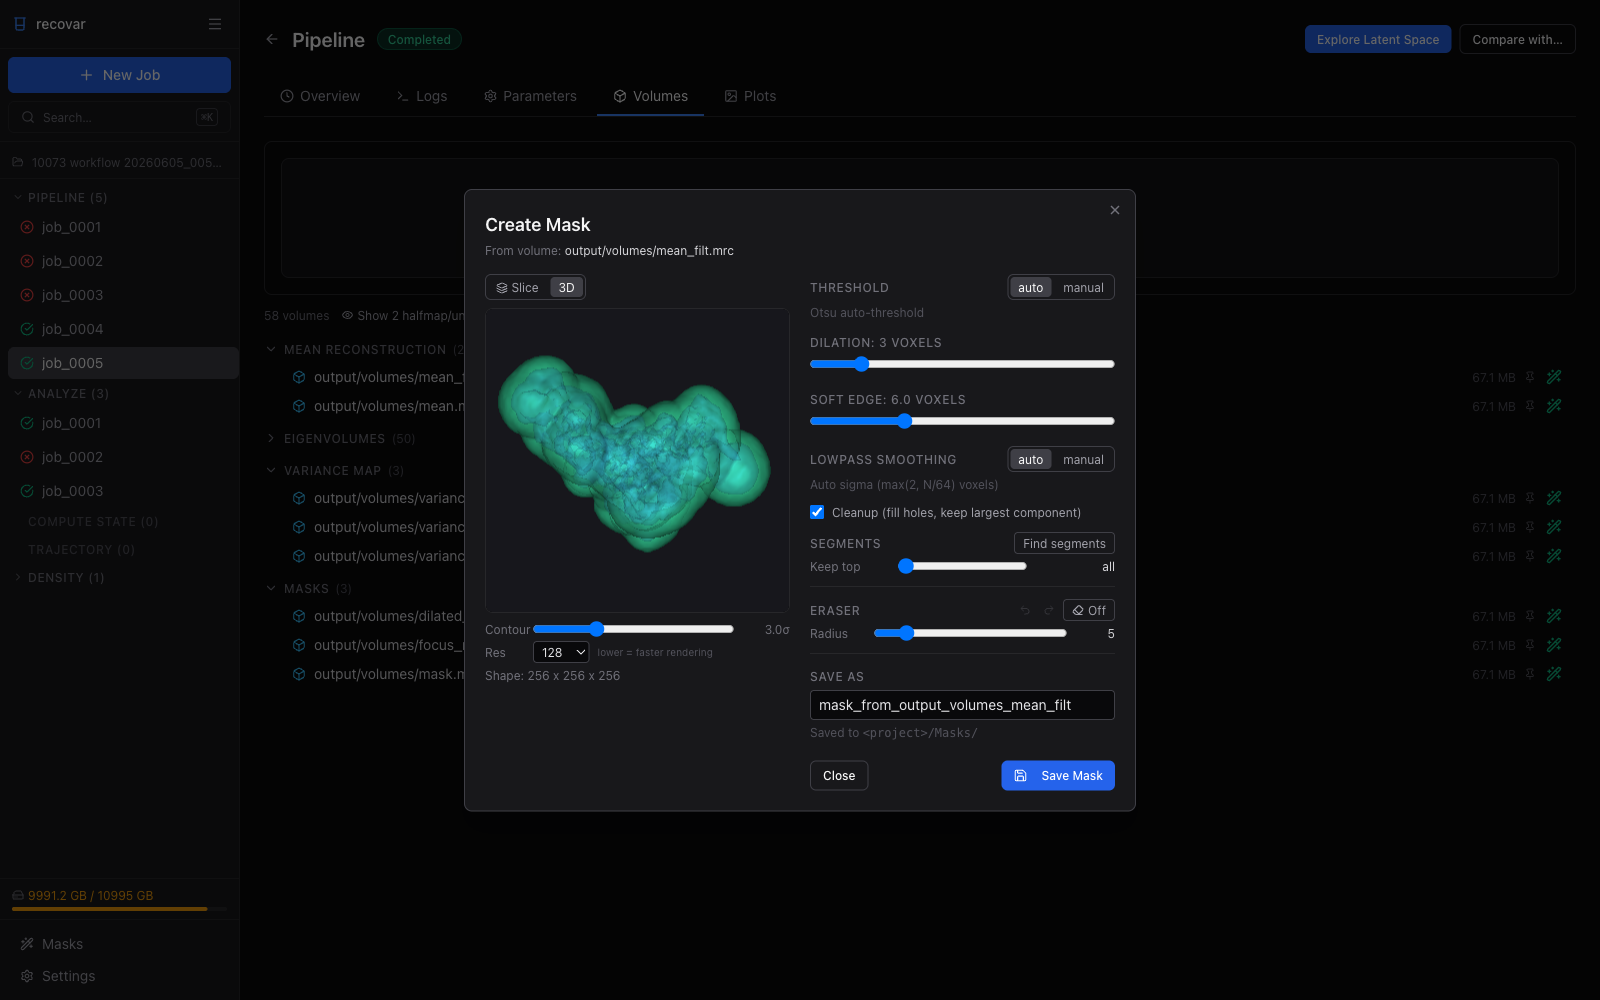
Click Save Mask to write the result to <project>/Masks/. It is then available as a solvent or focus mask in any new Pipeline job, and in the Masks library (sidebar), where you can combine masks with union / intersect / subtract.
The rest of this page covers the equivalent command-line options.
Solvent mask
Most consensus reconstruction software outputs a solvent mask. Use it directly:
Warning
Make sure the mask is not too tight. Use --mask-dilate-iter to expand it if needed.
Auto-generated masks
If you don't have a mask:
| Option | Description |
|---|---|
--mask=from_halfmaps |
Estimate mask from the mean reconstruction (averages half-maps, low-pass filters, Otsu thresholds, cleans up, and softens) |
--mask=sphere |
Use a loose spherical mask |
--mask=none |
No mask (not recommended) |
A good approach is to first run with --mask=sphere, inspect the variance map to see which regions have heterogeneity, then create a focused mask around those regions.
Focus mask
A focus mask restricts the heterogeneity analysis to a specific region of the molecule, such as a single domain or binding site.
If you only have a focus mask:
Creating a focus mask
Use the Mask Wizard above: open the mean reconstruction, set a threshold, and use the Segments control to keep only the connected region of interest.
You can also build one in UCSF Chimera or ChimeraX:
- Open your consensus map
- Select the region of interest
- Create a mask around that region
- Save as
.mrc
See cryoSPARC's guide on mask generation for step-by-step instructions.
Mask dilation
To expand a mask by a few pixels:
The --mask-dilate-iter flag applies to both the solvent mask and the focus mask.